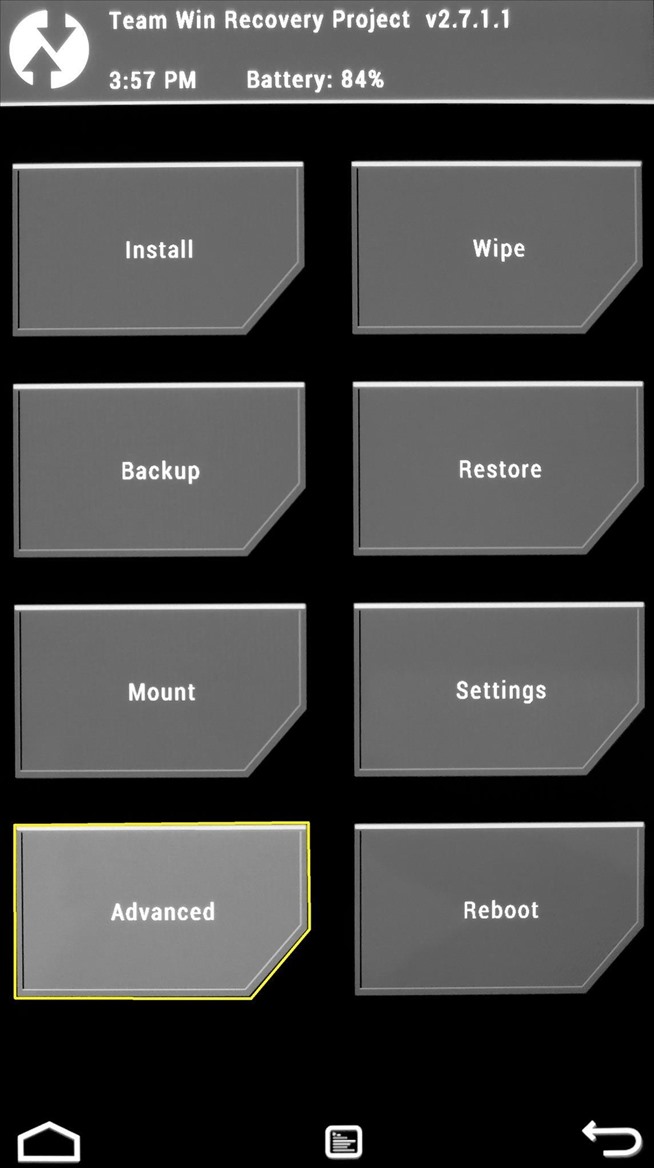
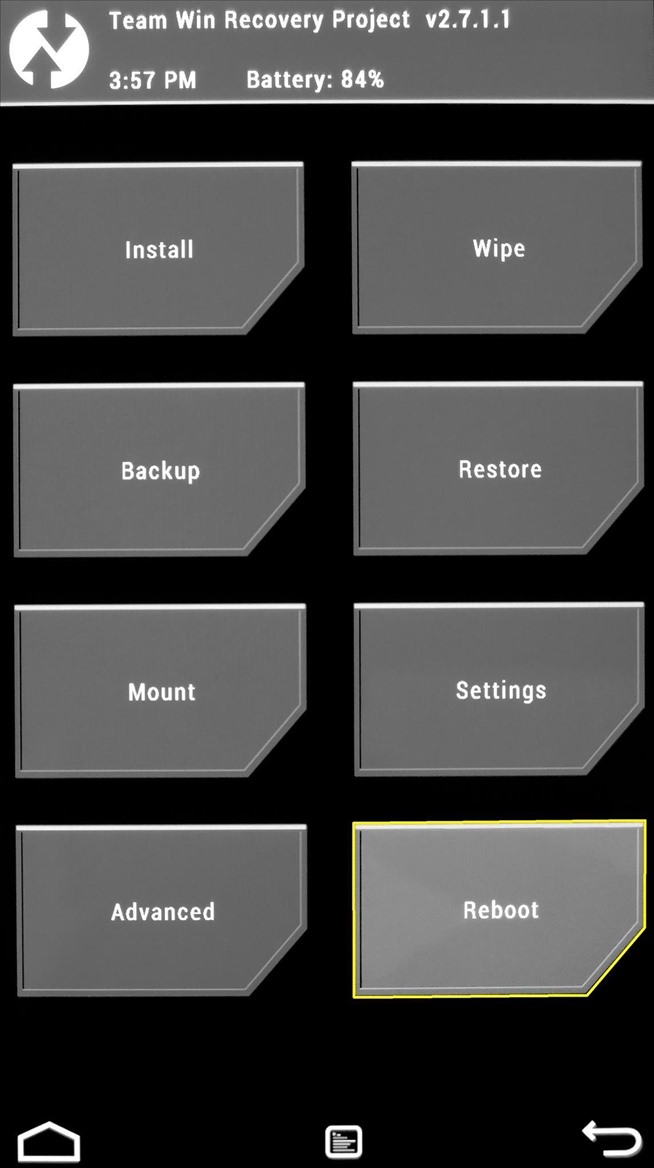
TWRP stands for Team Win Recovery Project , which is also a form of Recovery projects to cater to Android users want to install what has been the custom in their devices. TWRP originally used only for the Nexus line, then the newly pervasiveness of smartphones and tablet devices. Interface - View the top image , Unlike CWM recovery , TWRP using pure touch interface include large buttons, friendly and clearly indicate each function on the interface.
Some points to remember to use
1. Fixing PermissionsSometimes, flashing mods and installing root apps can cause Android to sorta "forget" what permissions various apps had to begin with. System-level apps need their permissions set a certain way to perform correctly, so you could end up with minor bugs and force closes after installing a hack.
If this ever happens, you can easily reset all apps on your device back to their proper permissions using TWRP.
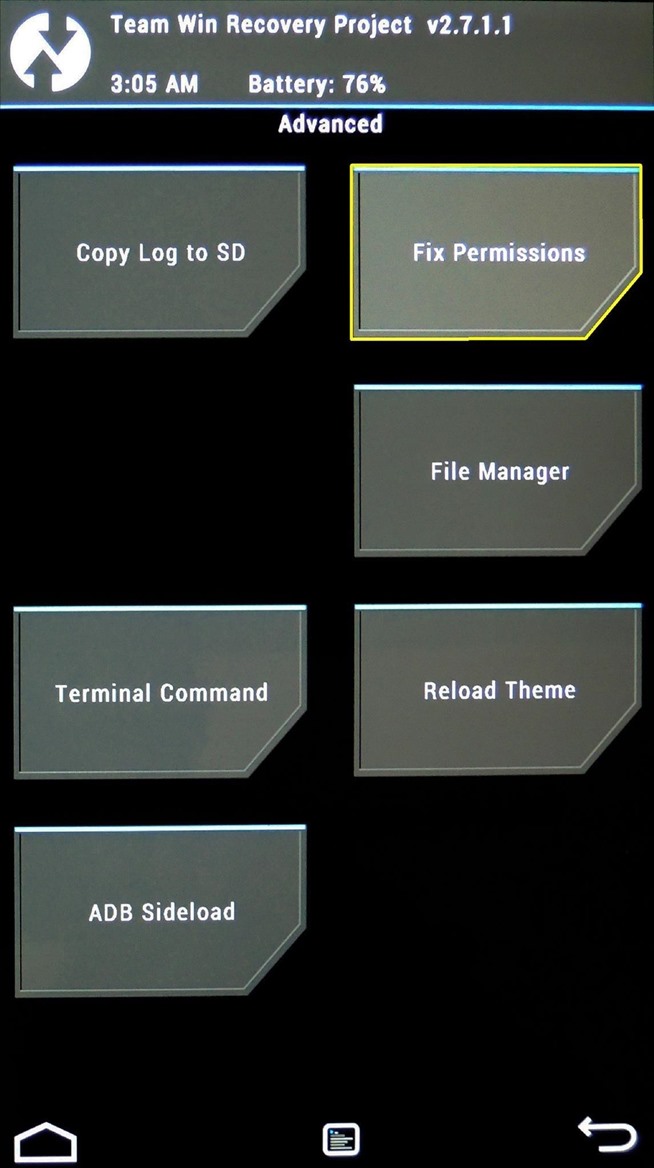
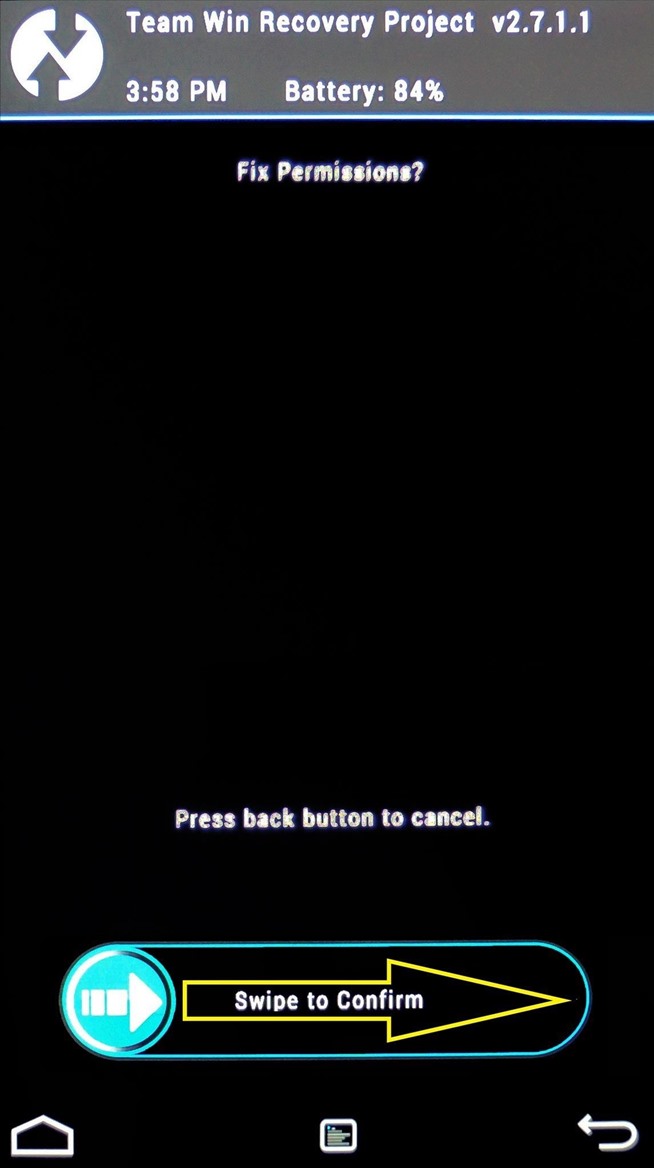
From the main screen, tap Advanced, then choose Fix Permissions from the following menu. Then just swipe the slider at the bottom and all of your apps will automatically be given the proper permissions for their respective folders.
2.Wiping Existing DataWhen using TWRP to install a new ROM, it's a good idea to wipe the existing firmware to give the new system a clean slate upon which to install.
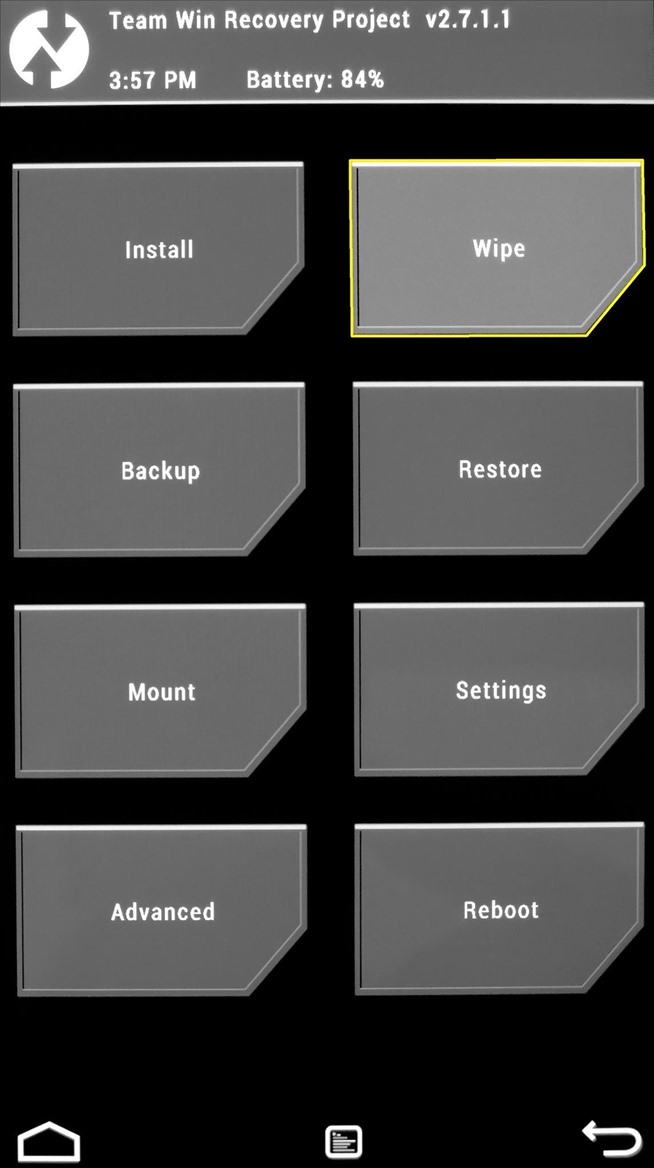
So before installing CyanogenMod, for instance, you'll want to wipe the stock firmware from your device so there are no conflicts. From TWRP's main screen, tap Wipe to begin. The preset wipe mode will work perfectly fine in most cases, so swipe the slider at the bottom to perform the wipe.
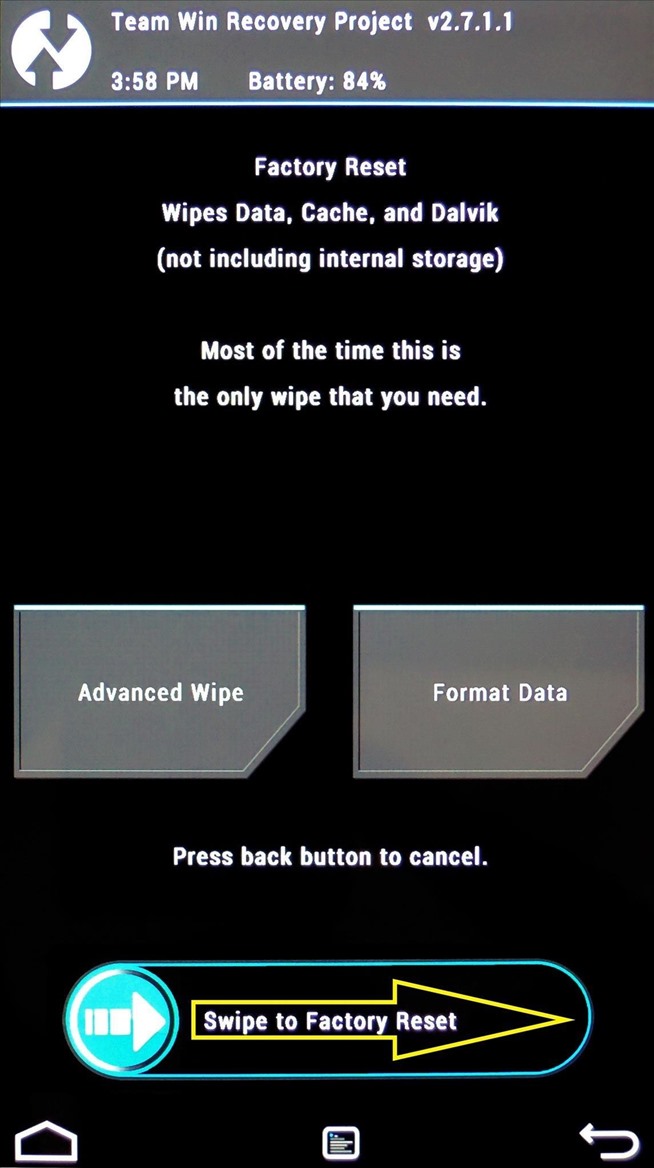
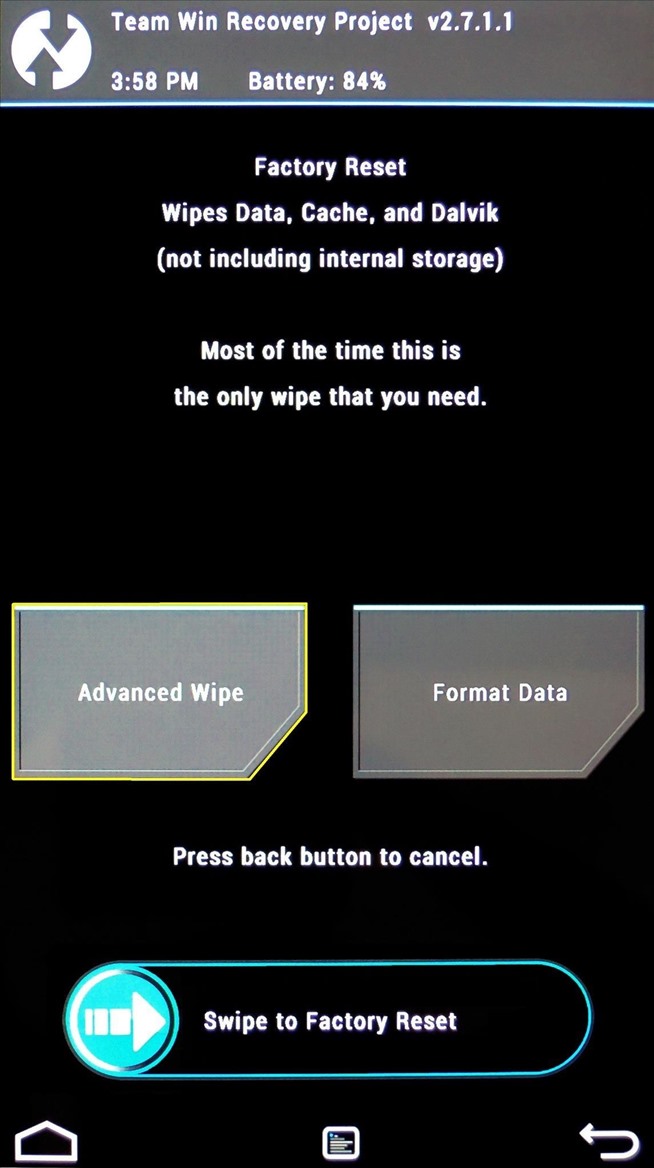
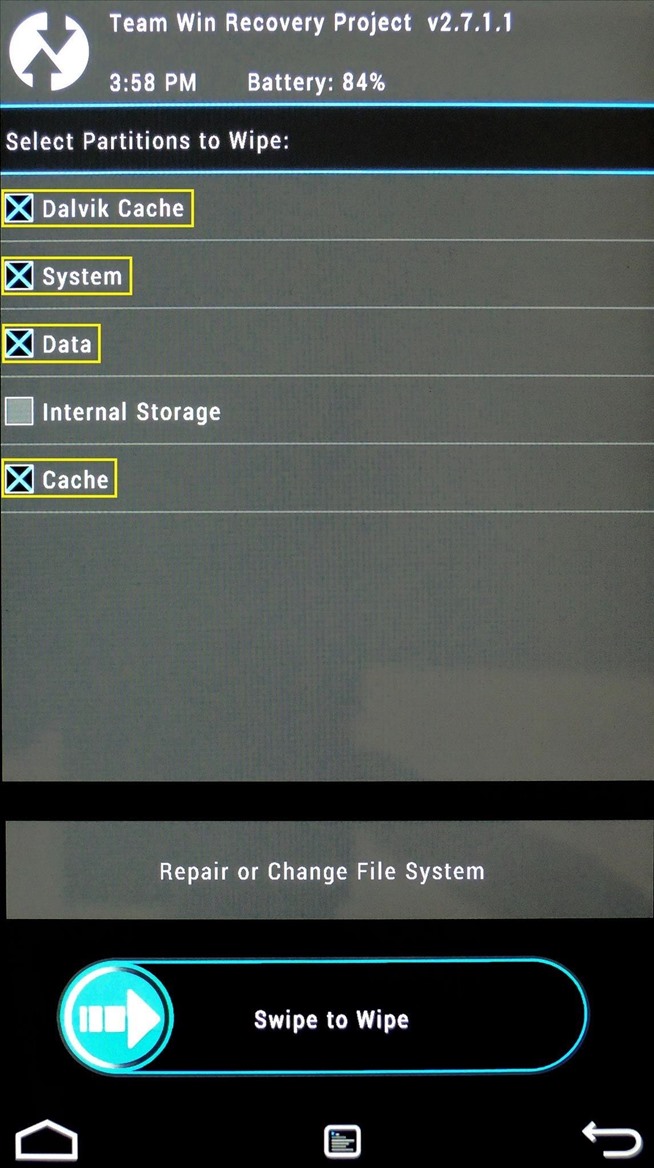
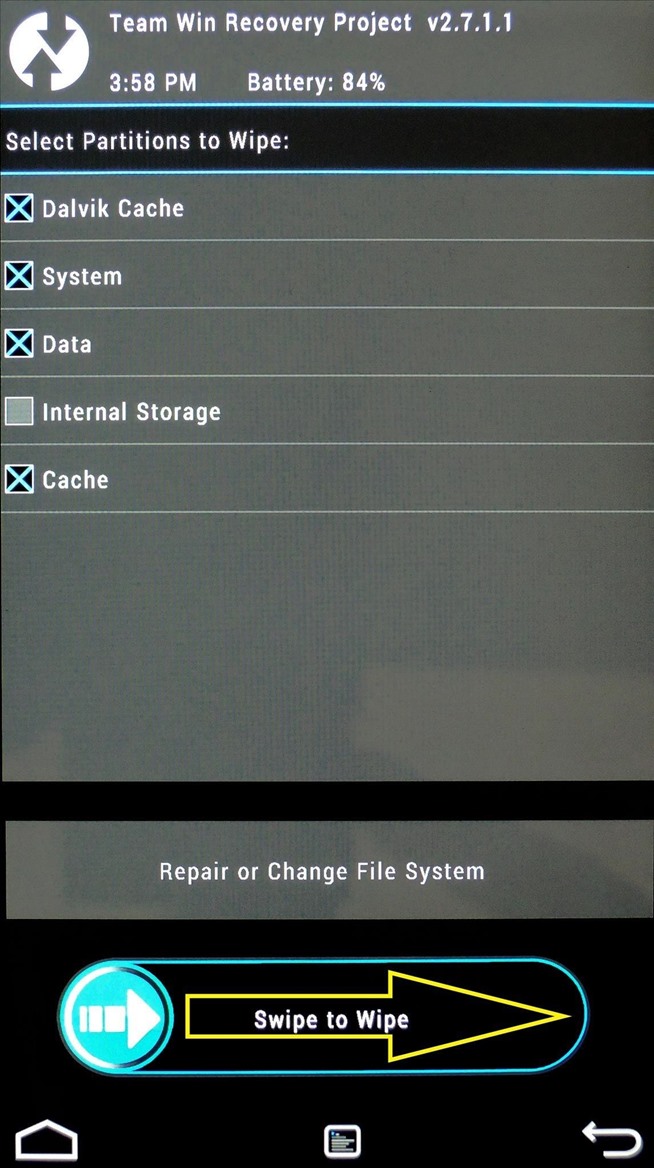
If you're experiencing bugs and you want a completely fresh start, or you just want to be entirely sure there's no preexisting data left to cause conflicts, you can use the Advanced Wipe feature from the same screen. From here, just tick the boxes next to Dalvik Cache, System, Data andCache, then swipe the slider at the bottom to perform a full wipe.
3. Install Zip File
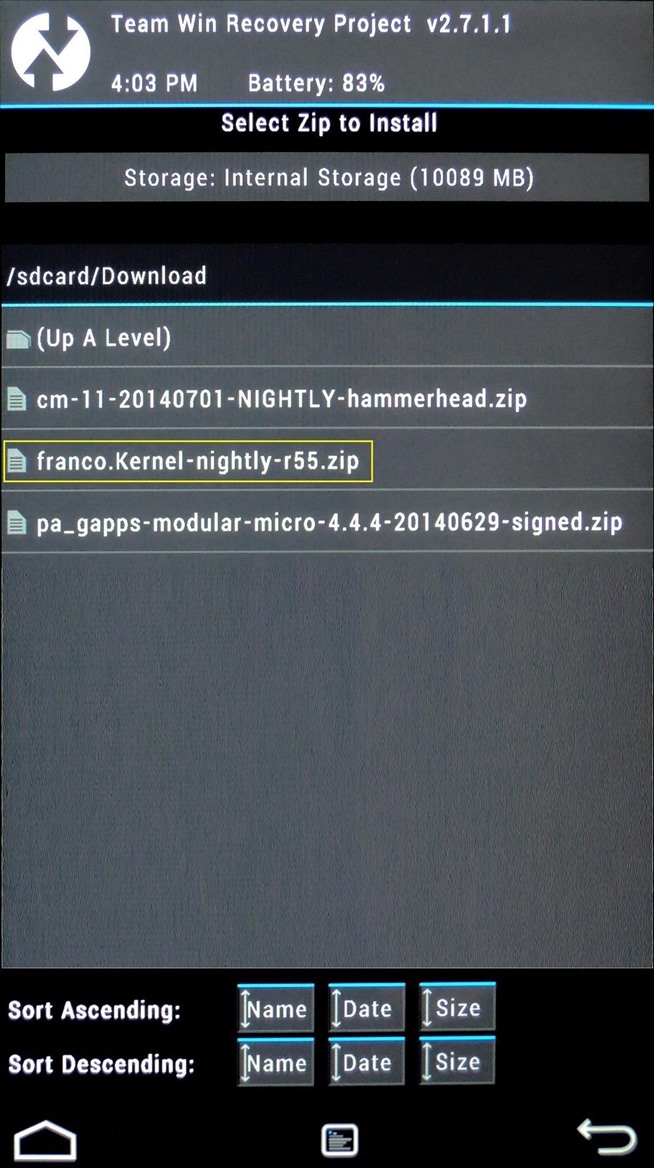
Flashing More Than One ZIP at OnceWhen you've tapped the first ZIP, rather than swiping the slider to install it, then repeating the process for all the ZIPs in question, simply hit the Add More Zips button. This will take you back to the folder tree view, where you can select your second ZIP. Hit Add More ZIPs again to add a third, and so on.
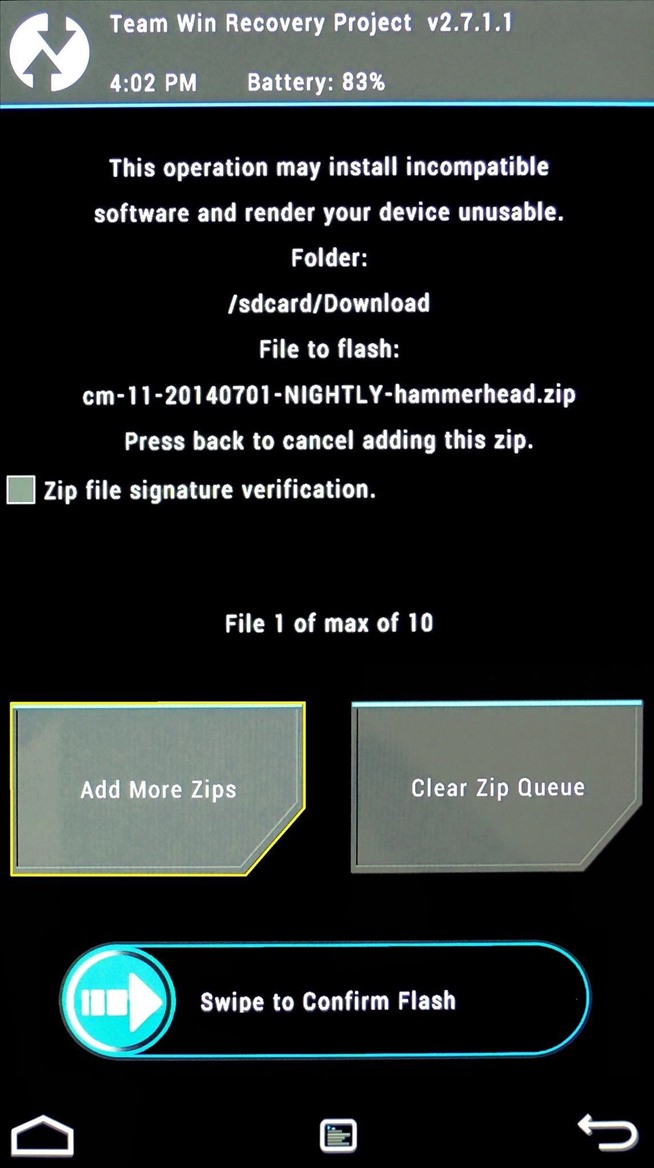

When you're satisfied with your selections, swipe the slider at the bottom, and all of your ZIPs will be flashed in sequential order.
Finalizing the Flashing Process
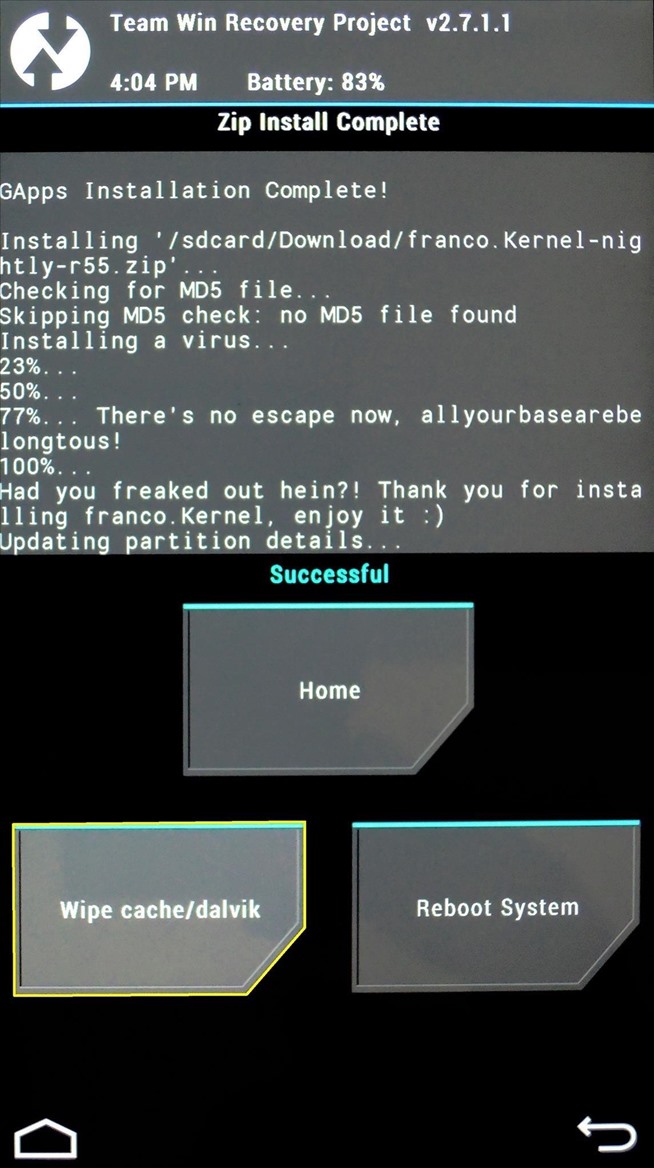
After installing a ZIP file, TWRP gives you a few options: Home, Wipe Cache/Dalvik and Reboot System. The first option takes you back to TWRP's main screen, and the third option should be self-explanatory. The second option, Wipe Cache/Dalvik, is one that should be noted.
Android accumulates various bits of data as you continue to use it. Sometimes, this data is specific to your current setup. Certain mods will cause conflicts between the new functionality they bring and the existing data on your device.
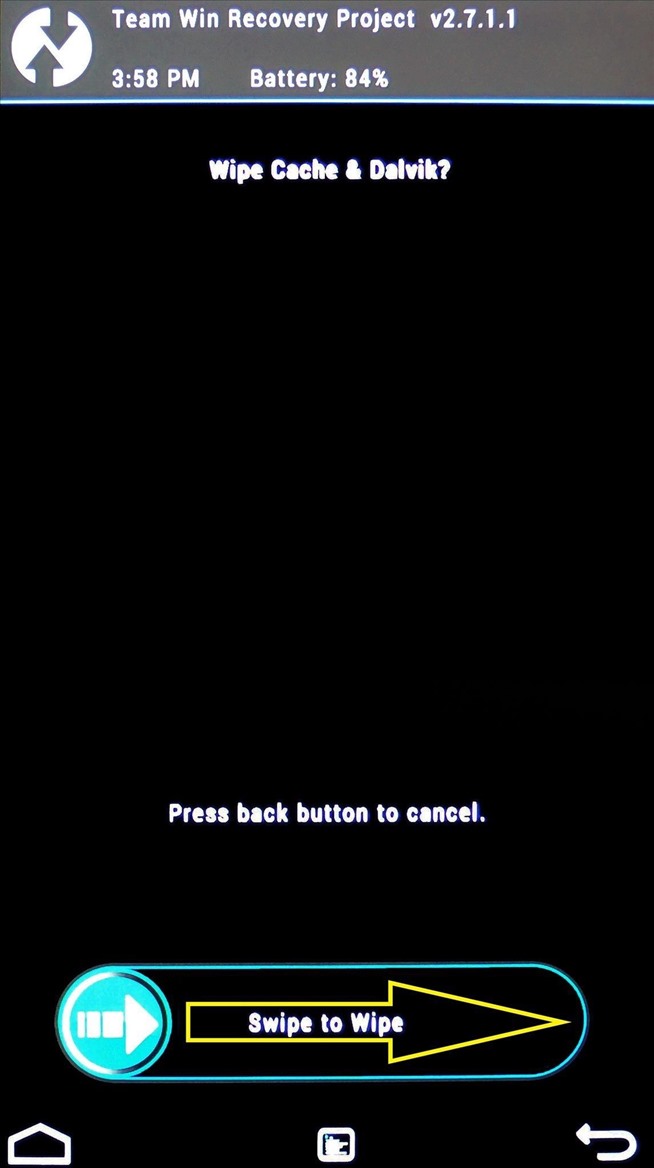
Most mods, however, will not cause a conflict with this data. But when in doubt, wipe it out—simply tap Wipe Cache/Dalvik after flashing a ZIP, then swipe the slider at the bottom to remove any potentially-conflicting data.
 4.Booting Back into Android
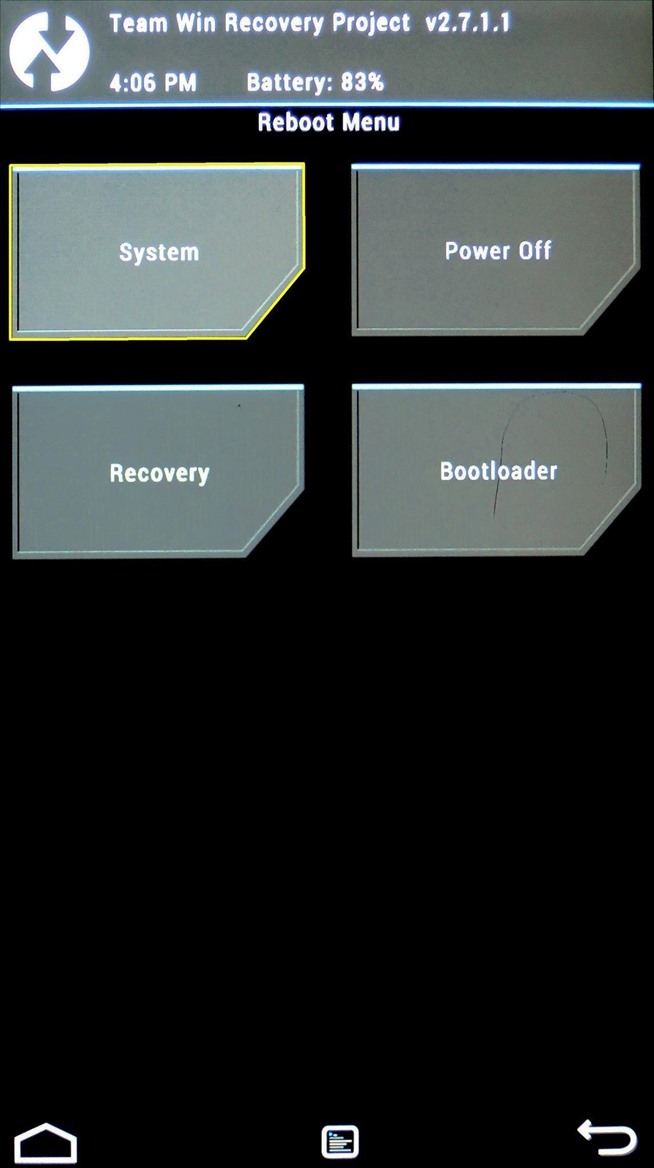
To get out of TWRP and back into Android, start by tapping the Rebootoption from the home screen. On the next menu, simply tap System to boot back into Android.
I hope this guide helped you get to know TWRP, because there are so many powerful things it can do. If you have any questions, post them in the comments section below and we'll be sure to answer them.
 Up Stock rom cho LG Update : Tool up stock rom LG lastest - 2014 In the course of using the LG smartphone users will encounter the nee...
 Rom Cloudyg3 2.0 for LG G3 Cat6 F460 I have guide how to flash rom cloudyg3 2.5 for LG G3 , refer [Hướng dẫn] Up rom Cloudy G3 2.5 cho...
 1. Install CloudyG2 3.1 For LG G2 Lollipop Stock Base General guide for the LG G2 have Stock rom Lollipop (F320, D801, D802, VS980), ...
 Cook Rom 4.1.2 for sky a760s a770k - Prefer for flash rom stock - Procedure : Root -> install Recovery -> Flash rom mod on Reco...
 Rom Cook VDT V11 - LTE2 F160 LG LTE2 F160 had been in Vietnam for a long time, the rom was formed for the Vietnam mod so much. Rom the...
 Up rom Binx Stock for Sky Pantech Korea There are many methods to original rom binx, most other methods are complicated or time consumi...
 Lollipop Rom for LG G2 This is a stable rom , rom flash easy for LG G2 Series : D800 , D801 , D802 , D803 , D804 , D805 , LS980 , VS980...
 Recovery tool - LG optimus G In previous posts I have shared with you on how to Root - Recovery of this, you refer to in this Guide K...
 LG IMEI Checker LGVinh would like to introduce to you a very useful tool for your favorite LG phone. This is a small tool but very wonde...
